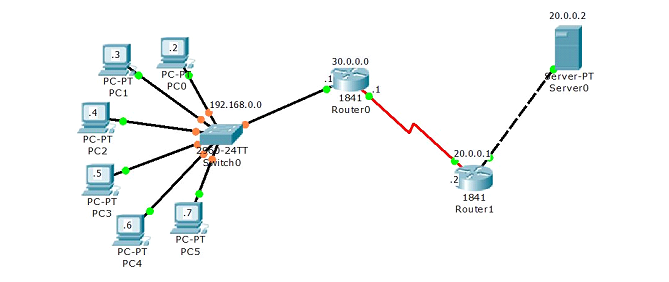
In this article I will demonstrate an example of OSPF Routing configuration. We will use four different series router so you can get familiar with all different platform covered in CCNA exam. Create a topology as shown in figure.
| 1841 Series Router0 (R1) |
| FastEthernet0/0 | Serial0/0/0 |
| IP address | 10.0.0.1 | 20.0.0.1 |
| Connected With | Pc0 | R2 on Serial 0/0 |
| 2811 Series Router0 (R4) |
| FastEthernet0/0 | Serial0/0/0 |
| IP address | 50.0.0.1 | 40.0.0.2 |
| Connected With | Pc1 | R3 on Serial 0/0 |
| 2621XM Series Router0 (R3) |
| FastEthernet0/0 | Serial0/0/0 |
| IP address | 30.0.0.2 | 40.0.0.1 |
| Connected With | FastEthernet0/0 | R4 on Serial 0/0/0 |
| 2620XM Series Router1 (R2) |
| FastEthernet0/0 | Serial0/0 |
| IP address | 30.0.0.1 | 20.0.0.2 |
| Connected With | R3 on FastEthernet0/0 | R1 on Serial 0/0/0 |
| PC-PT PC0 |
| FastEthernet0 | Default Gateway |
| IP address | 10.0.0.2 | 10.0.0.1 |
| Connected With | R1 on FastEthernet0/0 | |
| PC-PT PC1 |
| FastEthernet0 | Default Gateway |
| IP address | 50.0.0.2 | 50.0.0.1 |
| Connected With | R4 on FastEthernet0/0 | |
Configuring OSPF is slightly different from configuring RIP. When configuring OSPF, use the following syntax:
Router(config)# router ospf process_ID
Router(config-router)# network IP_address wildcard_mask area area_#
The process_ID is locally significant and is used to differentiate between OSPF processes running on the same router. Your router might be a boundary router between two OSPF autonomous systems, and to differentiate them on your router, you will give them unique process IDs. Note that these numbers do not need to match between different routers so they have nothing to do with autonomous system numbers.
To configure any router double click on it and select CLI.To configure this topology use this step by step guide.
(1841Router0) Hostname R1
To configure and enable ospf routing on R1 follow these commands exactly.
Router>enable
Router#configure terminal
Enter configuration commands, one per line.  End with CNTL/Z.
Router(config)#hostname R1
R1(config)#interface fastethernet 0/0
R1(config-if)#ip address 10.0.0.1 255.0.0.0
R1(config-if)#no shutdown
%LINK-5-CHANGED: Interface FastEthernet0/0, changed state to up
%LINEPROTO-5-UPDOWN: Line protocol on Interface FastEthernet0/0, changed state to up
R1(config-if)#exit
R1(config)#interface serial 0/0/0
R1(config-if)#ip address 20.0.0.1 255.0.0.0
R1(config-if)#clock rate 64000
R1(config-if)#bandwidth 64
R1(config-if)#no shutdown
%LINK-5-CHANGED: Interface Serial0/0/0, changed state to down
R1(config-if)#exit
%LINK-5-CHANGED: Interface Serial0/0/0, changed state to up
R1(config)#router ospf 1
R1(config-router)#network 10.0.0.0 0.255.255.255 area 0
R1(config-router)#network 20.0.0.0 0.255.255.255 area 0
R1(config-router)#exit
R1(config)#
(2620XM-Router1) Hostname R2
To configure and enable ospf routing on R2 follow these commands exactly.
Router>enable
Router#configure terminal
Enter configuration commands, one per line.  End with CNTL/Z.
Router(config)#hostname R2
R2(config)#interface serial 0/0
R2(config-if)#ip address 20.0.0.2 255.0.0.0
R2(config-if)#no shutdown
%LINK-5-CHANGED: Interface Serial0/0, changed state to up
%LINEPROTO-5-UPDOWN: Line protocol on Interface Serial0/0, changed state to up
R2(config-if)#exit
R2(config)#interface fastethernet 0/0
R2(config-if)#ip address 30.0.0.1 255.0.0.0
R2(config-if)#no shutdown
%LINK-5-CHANGED: Interface FastEthernet0/0, changed state to up
R2(config-if)#exit
%LINEPROTO-5-UPDOWN: Line protocol on Interface FastEthernet0/0, changed state to up
R2(config)#router ospf 2
R2(config-router)#network 20.0.0.0 0.255.255.255 area 0
R2(config-router)#network 3
00:03:10: %OSPF-5-ADJCHG: Process 2, Nbr 20.0.0.1 on Serial0/0 from
 LOADING to FULL, Loading Done0.0.0.0 0.255.255.255 area 0
R2(config-router)#network 30.0.0.0 0.255.255.255 area 0
R2(config-router)#exit
R2(config)#
(2620XM-Router2)Hostname R3
To configure and enable ospf routing on R3 follow these commands exactly.
Router>enable
Router#configure terminal
Enter configuration commands, one per line.  End with CNTL/Z.
Router(config)#hostname R3
R3(config)#interface fastethernet 0/0
R3(config-if)#ip address 30.0.0.2 255.0.0.0
R3(config-if)#no shutdown
%LINK-5-CHANGED: Interface FastEthernet0/0, changed state to up
%LINEPROTO-5-UPDOWN: Line protocol on Interface FastEthernet0/0, changed state to up
R3(config-if)#interface serial 0/0
R3(config-if)#ip address 40.0.0.1 255.0.0.0
R3(config-if)#clock rate 64000
R3(config-if)#bandwidth 64
R3(config-if)#no shutdown
%LINK-5-CHANGED: Interface Serial0/0, changed state to down
R3(config-if)#exit
%LINK-5-CHANGED: Interface Serial0/0, changed state to up
%LINEPROTO-5-UPDOWN: Line protocol on Interface Serial0/0, changed state to up
R3(config)#router ospf 3
R3(config-router)#network 40.0.0.0 0.255.255.255 area 0
R3(config-router)#network 30.0.0.0 0.255.255.255 area 0
00:04:53: %OSPF-5-ADJCHG: Process 3, Nbr 30.0.0.1 on FastEthernet0/0 from
 LOADING to FULL, Loading D
R3(config-router)#exit
R3(config)#
%SYS-5-CONFIG_I: Configured from console by console
R3#
(2811Router3) Hostname R4
To configure and enable ospf routing on R4 follow these commands exactly.
Router>enable
Router#configure terminal
Enter configuration commands, one per line.  End with CNTL/Z.
Router(config)#interface serial 0/0/0
Router(config-if)#ip address 40.0.0.2 255.0.0.0
Router(config-if)#no shutdown
%LINK-5-CHANGED: Interface Serial0/0/0, changed state to up
%LINEPROTO-5-UPDOWN: Line protocol on Interface Serial0/0/0, changed state to up
Router(config-if)#exit
Router(config)#interface fastethernet 0/0
Router(config-if)#ip address 50.0.0.1 255.0.0.0
Router(config-if)#no shutdown
%LINK-5-CHANGED: Interface FastEthernet0/0, changed state to up
%LINEPROTO-5-UPDOWN: Line protocol on Interface FastEthernet0/0, changed state to up
Router(config-if)#exit
R4(config)#router ospf 4
R4(config-router)#network 50.0.0.0 0.255.255.255 area 0
R4(config-router)#network 40.0.0.0 0.255.255.255 area 0
R4(config-router)#
00:06:32: %OSPF-5-ADJCHG: Process 4, Nbr 40.0.0.1 on Serial0/0/0 from
LOADING to FULL, Loading Done
R4(config-router)#exit
R4(config)#
PC-1
PC>ipconfig

IP Address......................: 10.0.0.2
Subnet Mask.....................: 255.0.0.0
Default Gateway.................: 10.0.0.1

PC>ping 50.0.0.2

Pinging 50.0.0.2 with 32 bytes of data:

Reply from 50.0.0.2: bytes=32 time=156ms TTL=124
Reply from 50.0.0.2: bytes=32 time=127ms TTL=124
Reply from 50.0.0.2: bytes=32 time=156ms TTL=124
Reply from 50.0.0.2: bytes=32 time=140ms TTL=124

Ping statistics for 50.0.0.2:
    Packets: Sent = 4, Received = 4, Lost = 0 (0% loss),
Approximate round trip times in milli-seconds:
    Minimum = 127ms, Maximum = 156ms, Average = 144ms
PC>
PC-2
PC>ipconfig

IP Address......................: 50.0.0.2
Subnet Mask.....................: 255.0.0.0
Default Gateway.................: 50.0.0.1

PC>ping 10.0.0.2

Pinging 10.0.0.2 with 32 bytes of data:

Reply from 10.0.0.2: bytes=32 time=140ms TTL=124
Reply from 10.0.0.2: bytes=32 time=141ms TTL=124
Reply from 10.0.0.2: bytes=32 time=157ms TTL=124
Reply from 10.0.0.2: bytes=32 time=156ms TTL=124

Ping statistics for 10.0.0.2:
    Packets: Sent = 4, Received = 4, Lost = 0 (0% loss),
Approximate round trip times in milli-seconds:
    Minimum = 140ms, Maximum = 157ms, Average = 148ms
You can verify that ospf is running successfully via show ip protocols command in privilege mode.
R4#show ip protocols

Routing Protocol is "ospf 4"
  Outgoing update filter list for all interfaces is not set
  Incoming update filter list for all interfaces is not set
  Router ID 50.0.0.1
  Number of areas in this router is 1. 1 normal 0 stub 0 nssa
  Maximum path: 4
  Routing for Networks:
    50.0.0.0 0.255.255.255 area 0
    40.0.0.0 0.255.255.255 area 0
  Routing Information Sources:
    Gateway         Distance      Last Update
    40.0.0.1             110      00:01:26
  Distance: (default is 110)

R4#
You can use show ip route command to troubleshoot ospf network. If you did not see information about any route checks the router attached with that network.
R4#show ip route
Codes: C - connected, S - static, I - IGRP, R - RIP, M - mobile, B - BGP
       D - EIGRP, EX - EIGRP external, O - OSPF, IA - OSPF inter area
       N1 - OSPF NSSA external type 1, N2 - OSPF NSSA external type 2
       E1 - OSPF external type 1, E2 - OSPF external type 2, E - EGP
       i - IS-IS, L1 - IS-IS level-1, L2 - IS-IS level-2, ia - IS-IS inter area
       * - candidate default, U - per-user static route, o - ODR
       P - periodic downloaded static route

Gateway of last resort is not set

O    10.0.0.0/8 [110/1564] via 40.0.0.1, 00:02:37, Serial0/0/0
O    20.0.0.0/8 [110/1563] via 40.0.0.1, 00:02:37, Serial0/0/0
O    30.0.0.0/8 [110/782] via 40.0.0.1, 00:02:37, Serial0/0/0
C    40.0.0.0/8 is directly connected, Serial0/0/0
C    50.0.0.0/8 is directly connected, FastEthernet0/0
R4#
To test ospf routing do ping from pc1 to pc2 and vice versa. If you get replay then you have successfully configured ospf routing but if you did not get replay double check this configuration and try to troubleshoot. I have uploaded a configured and tested topology in case you are unable to locate the problem spot then download this configuration file. And try to find out where have you committed mistake
Configuration command of OSPF
| Commands | Descriptions |
Router(config)#router ospf 1
|
Starts OSPF process 1. The process ID is any positive integer value between 1 and 65,535.
|
Router(config-router)#network 172.16.0.0 0.0.255.255 area 0
|
OSPF advertises interfaces, not networks. Uses the wildcard mask to determine which interfaces to advertise.
|
Router(config-if)#ip ospf hellointerval timer 20
|
Changes the Hello Interval timer to 20 seconds.
|
Router(config-if)#ip ospf deadinterval 80
|
Changes the Dead Interval timer to 80 seconds.
|
NOTE: Hello and Dead Interval timers must match for routers to become neighbors
|
Router#show ip protocol
|
Displays parameters for all protocols running on the router
|
Router#show ip route
|
Displays a complete IP routing table
|
Router#show ip ospf
|
Displays basic information about OSPF routing processes
|
Router#show ip ospf interface
|
Displays OSPF info as it relates to all interfaces
|
Router#show ip ospf interface fastethernet 0/0
|
Displays OSPF information for interface fastethernet 0/0
|
Router#show ip ospf border-routers
|
Displays border and boundary router information
|
Router#show ip ospf neighbor
|
Lists all OSPF neighbors and their states
|
Router#show ip ospf neighbor detail
|
Displays a detailed list of neighbors
|
Router#clear ip route *
|
Clears entire routing table, forcing it to rebuild
|
Router#clear ip route a.b.c.d
|
Clears specific route to network a.b.c.d
|
Router#clear ip opsf counters
|
Resets OSPF counters
|
Router#clear ip ospf process
|
Resets entire OSPF process, forcing OSPF to re-create neighbors, database, and routing table
|
Router#debug ip ospf events
|
Displays all OSPF events
|
Router#debug ip ospf adjacency
|
Displays various OSPF states and DR/ BDR election between adjacent routers
|
Router#debug ip ospf packets
|
Displays OPSF packets
|


.png)


